Friday 27 January 2023

“Get your kicks from Route 1866!”

This post is a bit late but last Saturday the guys were here at the Burrow to play an 1866 game using modified Picket’s Charge (largely done by Neil with a bit of input fr4om me). John, Neil and Paul (seen below) were the Prussians, while Conrad, Nigel and Mike played the Austro-Saxons but without wearing spiked hats!

The scenario was a fictional mash up of the frontier battles at the start of the war, with the Prussians needing to quickly debouch from the mountains (just off table to the left in the photo below) and push any Austrian resistance out of the way. Neil kept us right with the rules which was of great assistance in keeping the game moving.

Here then is a brief narrative and some photos to show how the game played out. Enjoy!

The Prussian triumvirate looking suitably pumped before the game.......
The battlefield.
Nigel commanded a brigade of Austrian light cavalry over on the Austrian left. They looked splendid but apart from their attached horse artillery took no part in the battle other than being a target for Prussian gunners. 

The Prussians have advanced rapidly in the centre and are moving up the hill in the teeth of six batteries of the Austrian corps reserve artillery (including a rocket), a tactic that did not work out too well.....

Paul's Prussians on their left made a more stately advance towards the  thinly held Austrian right.

Prussians on the attack.
Neil’s divisional artillery was held up on the road and unable to deploy until quite late in the game. I really must think about limbers for these armies.
Undaunted by the Austrian artillery, the Prussians continued their attack in the centre.
Although the Prussian assault in the centre was bloodily repulsed the Austrian artillery took heavy losses and several batteries were withdrawn rather than risk them being destroyed. They were replaced by fresh batteries from the Saxon division as seen here. Quite a realistic bit of damage limitation.
The central Prussian attack, now with artillery support.
On their right flank the  Austrians were attempting to enfilade Paul’s attack
The Austrians advanced against the Prussians facing them on their left, but were soon forced to pull back out of the killing zone that was the field, and shelter behind the hedgerow.
 Prussian dragoons crossing the stream behind elements of Johns advancing division.
A Saxon brigade held the hill in the Austrian centre, supporting the corps reserve artillery.
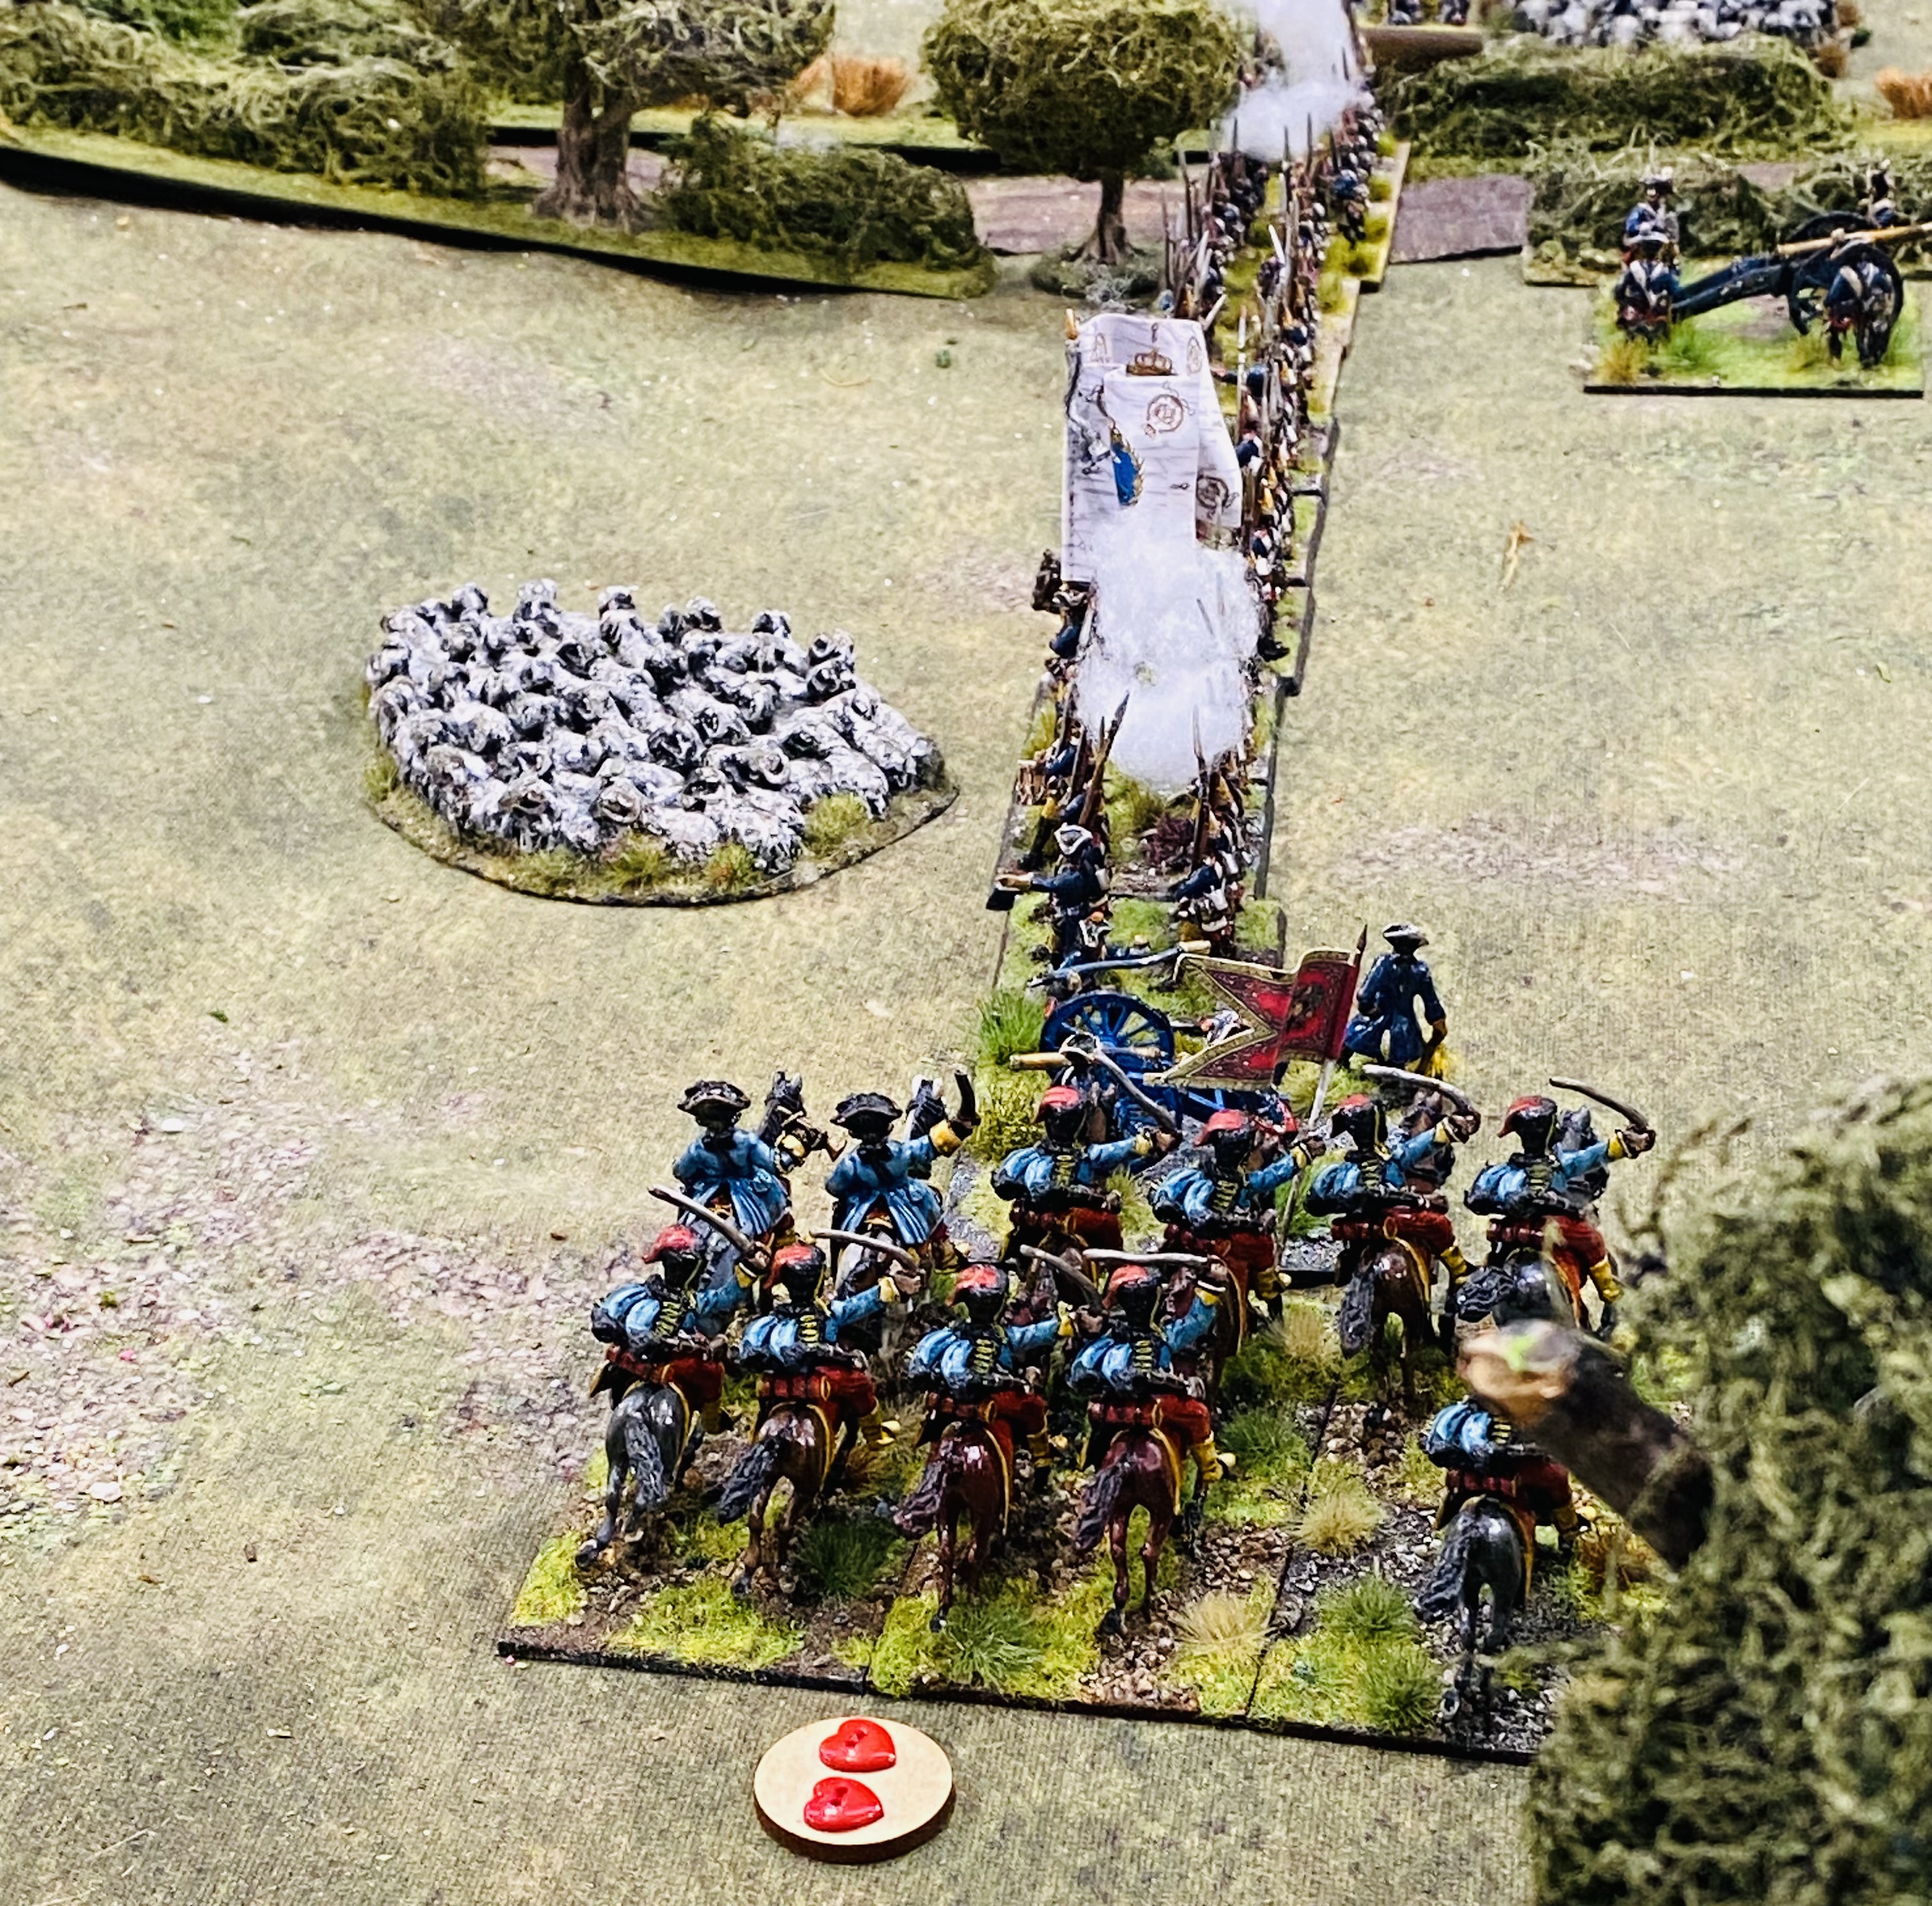
Paul chose to use his cavalry brigade to buy some time for his beleaguered and battered infantry on the left. They charged the Austrian right wing. Guess what happened……
A battalion of infantry from Anhalt.
Fierce fighting in the centre.
Exhausted cat

War sure ain't no picnic, except here it is....

The Prussian attack was seriously blunted so by the time we had to cease fire it was clear that the Austrians had achieved their objective of halting the enemy invasion. Of course, they'd only won a short reprieve but it was enough. 

The rules and amendments worked nicely, with maybe a few more tweaks needed, and we shall be looking at how to best reproduce skirmish screens as they don't really figure in PC but are an important part of GdA. Of course, the Austrians were not known for their skirmishing compared go the Prussians who would keep feeding more men into their skirmish line to overwhelm the enemy by fire.

We also had to remember to space out the artillery batteries as while I only have a single gun and crew representing a battery, the rules suggest three models. Now, trebling the number of guns and crews for four armies (these two and the French and Piedmontese) is not going to happen but I have  an idea using some sabot bases which I shall try out.

The return to the Six Weeks War has got me enthused into finishing off what figures I have left to do, so I am busy with them now; a few (six) Austrian battalions, a hussar regiment and for the Prussians, the troops of the Oldenberg/Hanseatic Brigade.

I am planning to have a game during the week and then next Sunday it is Vapnatark, the York show.

Friday 20 January 2023

20mm 3D printed European Buildings

I think I must have had a rush of blood to the head or something as I present here yet more buildings from  the awesome and extensive range of .stl files available from shop@najewitz.de. Adequately painted by me.


And no I am not going to build all of Leipzig!


Thursday 19 January 2023

Lots of Valour but lacking in Fortitude……

 ……on my side of the table at least. On Tuesday afternoon John the Red and I tried out the new Valour and Fortitude fast play, back-of-a-fag-packet rules from the Perry Twins and Jervis Johnson.  We kept things simple with two brigades of infantry, a brigade of cavalry and a battery of guns each, although to maintain my preference for asymmetrical army composition the French had an extra battalion, compensated for by the British having a battalion of Footguards.

The battlefield. Brits on the left.

John took the French. I was using troops from my Revolutionary Wars French and British collections as I don’t own any ‘proper’ Napoleonic Wars armies. (John pointed out correctly that actually I do, with 1806 Prussian and Saxons and 1812 British and Americans, but no French). I’d set the table up for a straight meeting encounter with both sides fighting to control the crossroads, bridge and the plateau. 

The British right flank. Very smart boys!

The British light dragoons, deployed impotently on my left.

I will give my feedback on the rules at the end but here are some photographs of the encounter with a few words of explanation. The official (i.e. mine) view is that as the game was a play test normal restraint and common sense went out of (my) window. Read on………

The Footguards make their way through the town beneath the heights.
My 1st brigade advanced boldly up the road towards the enemy centre. My combined flank company battalion was swept away by a column of French infantry.
My Guards battalion was left isolated and assailed from the front and the flank. They held on for a turn but then broke, marking the end of my 1st Bde.
My second brigade’s advance was halted by the appearance of the French cavalry brigade, forcing them into square.
British (mainly Scots) rooted to the spot. Even such a wonderful target for the artillery as a brigade of enemy cavalry didn’t improve their accuracy. Even when they were charged by the French they were hopeless but did hold on until round two of the melee when they ran.
I decided to switch flanks with my cavalry and they began an epic gallop from the left to right flanks.
My light dragoons swept from one flank to the other taking more than just the odd casualty from the French centre before they charged into the enemy chasseurs a cheval.

My force was shattered. One brigade of infantry had broken, as had my cavalry brigade (those ‘odd’ casualties taken during their ride from one flank to the other proved to be disastrous). My remaining brigade less the artillery was pinned in square and unlikely to be able to escape. An absolute disaster for the British!

We made loads of mistakes early on in the game but once we got into them the rules worked well. We did have a number of queries, the solutions to which don’t seem to be covered by the rules. These include:

  • Are skirmishers allowed to evade?
  • Likewise, can artillery try and bug out if charged?
  • Artillery seemed to be weak and a waste of space.
  • Absence (so far as we could see) of closing fire means that a cavalry unit can start a charge outside of musket range and make contact without taking any defensive fire. This cannot be right surely? 
  • Countercharges and forming square as a charge reaction don’t seem to figure in the rules?
  • The special rules for each army were just enough.
  • The use of a customised deck of cards for each army is not too gimmicky nor do they have a too heavy impact on the game.
  • What happens at the end of a melee if neither side breaks or it is a draw? 
If any more queries spring to mind I shall add them here. I did enjoy getting thrashed and am looking forward to another run out with them.

Big game here again on Saturday coming. 


Wednesday 11 January 2023

20mm European Building

I finally finished this piece this afternoon. It’s a 3D print of one of the gates of Leipzig rather averagely painted and based by me.


I’m still preferring 20mm or 1/72 scales buildings for 28mm games as they have a small footprint. If you recall I have lots of scruffied up HO railway models and they work fine imho. The hussars in the photo are 28mm and I don’t think they look out of place and they certainly won’t with thousands of miniatures on the table! 

I’ve a few more 20mm buildings to finish, mainly for the Fall of France but some more from the excellent Leipzig range.

Sunday 8 January 2023

"I think the King will lose this day" said Marshall Daun before Kolin. Was he right?

The first game of the year was played out yesterday, a large refight of one of my favourite Seven Years War battles, Kolin. It was a full house, and Conrad, Richard, John the Red and Nigel were the Austrians while Dave, Paul, Shaun and John H were the Prussians. I decided to use Black Powder with some of our usual house rules.

Notes on terrain. Troops shooting through or into the standing crops did so at -1. The hedgerows and tracks are representing sunken lanes. Troops in the sunken lanes benefit from cover but if behind the hedges themselves they do not. 

The game about to kick off. Prussians looking worried on the left. Austrians also looking worried on the right.
The bulk of the Prussian army is either not yet on the table or strung out in column along the road, overlooked by the Austrians to their right. Shaun anxiously looking over his right shoulder towards their reinforcements.
The Austrian left wing. Thankfully for the Prussians these troops were not allowed to activate until turn four, or if the Prussians came within 24" of them.


The Austrian centre from their rear. Grenz and a lone battalion of grenadiers and a battery of artillery.

On the Prussian left, their hussars quickly became embroiled in combat with their Austrian counterparts.  By turn two the Austrians had defeated all four regiments of Prussian hussars thanks to some unusually bad dice scores from Paul, although the Austrians would say it was down to their tactical brilliance!
The flight of the Prussian hussars left the flank of their attack exposed and open to attack. The Austrians charged but superior discipline and some better dice rolls meant the Prussian grenadiers beat off the enemy attack, although their supporting artillery was overrun.

The Austrians tried to exploit their victory against the Prussian left but were countered by a brigade of Prussian cuirassiers. Sadly for the cuirassiers, by this time Nigel had brought his Saxon cavalry and attached Austrian elites forward, and the Prussians were pushed back and broken. 

In the centre after a delay the Austrians finally got their troops to move in order to counter the Prussian onslaught in the centre.


The Prussian attack in the centre captured the old Swedish earthworks and drove most of the Grenz out of their positions.

I should have expected this move from Conrad, as two brigades of heavy cavalry posted behind their left wing rapidly advanced against the Prussian right and suddenly surged forward for three moves as he'd thrown something ridiculously low. Eight regiments is a scary sight.

The presence of so much Austrian cavalry meant that the remaining Prussians due to arrive along the road were delayed and at no little risk once they appeared. The lead battalion (IR 15 Garde) did deploy to cover the entry of the rest of the brigade. They did not shoot such a tempting target as we only allow infantry to move once and still fire.

John H and his remaining troops arrived a turn late, which was to prove a critical delay.

Conrad's cavalry swept away a brigade of Prussian dragoons and a lone cuirassier regiment and galloped along the enemy baseline, pursued by John H's infantry and cavalry. 

The Austrians were held up by the valiant efforts of IR40, who survived a flank charge, reversed their rear ranks and prepared to sell their lives dearly. 

John's Prussians advanced against the Austrian left wing under Richard,  ignoring the threat of enemy cavalry to their rear as four regiments of Prussian cuirassiers had just arrived.
                              
The Prussian right, with Conrad's Austrian cavalry in the distance behind the Prussian lines. 

Austrian and Saxon horse on the Prussian left.

The Prussian left, crumbling under the pressure from the Austrians, and due to Paul's continued and statistically unfair dice rolling!
Austrian cuirassiers seen through a window in one of the villages they rode past.

John the Red's infantry made it to the sunken lanes and began trading shots with the Prussians. Attack over.

I did a quick roll call and it showed that the Prussians were in deep trouble. Their hussars and cuirassiers on the left had been destroyed and the infantry attack in the centre had been stopped, due largely to a dogged Austrian defence but also to the presence of enemy cavalry on their flanks and rear! Only on he Prussian right was anything going reasonably well, but it was too late. John H's infantry had driven back Richard's Austrian battalions and his cuirassiers had caught up with Conrad's roaming horsemen in the rear of the army. However, by now over half of the Prussian army brigades were in retreat, off the table or were broken and retiring. Many of the troops in the centre would be unable to retreat due to the Austrian cavalry and would be captured. In fact only John H had troops actually under orders!

All this and it was only 2pm real time, and after no more than six turns the Prussians had been comprehensively defeated. Quite an achievement but there was definitely something awry with the Prussian dice rolling yesterday. Conrad's mad charge around the Prussian army would probably not have happened or been as successful if he hadn't been able to get the three moves needed to cross the battlefield and thus delay the Prussian reinforcements. The Prussians needed these infantry to press home the attack but they had to do without them.

This was a splendid game and despite the early finish was thoroughly enjoyable. It was also a major boost to my gaming mojo after a couple of months of illness, uncertainty over my wife's health and a touch of le cafard. Black Powder worked really well again as usual. While not my favourite ruleset for the SYW they're easier to manage than, for example, Honours of War, where the alternate move and fire system for opposing brigades would have slowed things down significantly, and not everyone is familiar with Paul's Panoply of War set. Everyone is familiar with BP and they work for big games such as this.