Sunday 30 January 2022

War of 1812 The Battle of the Grape River

I’m very late in posting this AAR but, this fictitious battle set in the War of 1812 was conceived and played out to a conclusion over a week ago, last Saturday here at the Burrow. The British objectives were to capture both bridges, the redoubt and the block house to support a landing in force from the naval squadron on Lake Misnomer. Victory would secure the southern shore of the lake for the Anglo-Canadians and thus the lake itself from yet more American aggression. Of course the Americans would say they were holding the lakeside to prevent any such incursion by the redcoats. This was in order that sufficient forces could be assembled to wrestle control of the lake from said redcoats and cross it to invade Upper Canada. Conrad, Neil and Nigel (CinC) were the Americans, and they faced initially just Paul and Dave, to be joined once the fridge man had been and done his stuff, by John.

British on the right.

Now, I probably have more troops available than did either side in this war, but with a figure scale of 1:10 I can comfortably get away with it. I actually have half a dozen more units to finish off, mainly Americans, plus several sloops, brigs, gunboats and the like should I wish to do some 28mm naval gaming! I must have bought them for some reason. One day……. 

From the other end of the table.
The British advance guard of combined militia flank companies, the Canadian Voltigeurs and 1st Nations pushes ahead almost to the bridge. 

In the centre the Americans cross the river and take on the British ensconced in the central wood.

1st Nations troops with a contingent of Caldwell's Western Rangers in support at 'the family plot'.

Regulars crossing the river in the face of stubborn resistance from the NY Militia brigade.
British regulars crossing the river above the second bridge.

Kentucky mounted Rifles on the extreme right flank chased these 1st Nations into the farm. The Americans were driven off once but a second time with a fresh unit they destroyed the native warriors.

US regulars brigade in the centre.
The American right above the large bridge. With the exception of a few skirmishers the British have moved off towards the lakeside.

The US extreme right wing. Mounted Rifles, militia infantry and militia dragoons supported by a troop of regular US dragoons.


In the centre the British are pressing the Americans back, slowly gaining the upper hand.

American reserves from the extreme right, much needed regulars.
Meanwhile, John had arrived so the British reinforcements did also, in the shape of a  landing on the lakeside.
One large oared gunboat with a 32pdr carronade in the bows. 

HM Sloop of War Doright

Marines and regular infantry advance towards the militia brigade under Conrad. 

The Americans are initially successful in holding the British but their entire brigade chose that moment to become spent! They had to withdraw.
It took several attempts to capture the battery, held by men of the US Navy. They were finally overrun. by HM 1st Foot.
Canadian Select Militia flank companies occupy the farm while the Kentucky Mounted Rifles mill about not sure what to do. 

US militia and regular cavalry form a rearguard with the collapse of the centre and the absence of further American reinforcements.
The Royal Marines break the NY Militia.

The  American army was under pressure, and with two broken brigades and the loss of the redoubt (and shortly the blockhouse), they were forced to give ground and pull back, leaving the field to the British.

Another great game. The British were afflicted by a serious run of '6's' when being shot at which slowed them down a fair bit, but in the end they were able to bring their marginally superior quality troops to bear.


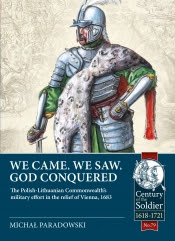
‘We Came, We Saw, God Conquered’. Vienna 1683.

‘We Came, We Saw, God Conquered’ is without doubt a stunning addition to Helion’s Century of the Soldier series and quite probably the best English language book on its subject I’ve come across to date. ‘The Polish-Lithuanian Commonwealth’s military effort in the relief of Vienna, 1683’, (to give its full title) by Michel Paradowski, is going to fuel the interests of military history buffs and wargamers alike. It got me on both counts!

In preparing for writing this book Michel was able to access a wide array of primary and secondary sources; sources written in Polish which had previously been inaccessible to the majority of native English-speaking authors, and in doing so he has produced a deeply researched and fascinating masterpiece. The level of detail and the sheer range of information contained within the book is impressive, and I was left thinking that my understanding of the subject matter, a topic I’ve read much about previously, has been greatly enhanced and also in many ways, reshaped, for the better.

The history and the organisation of the Polish and Lithuanian armies, and how they were effected by politics and shifting loyalties, are described in great detail, as are all the many and varied different types of soldiers under the command of the King, including much detail on organisation, recruitment, dress, weapons and equipment.

The advance on Vienna and the preparations for the battle set the scene for the main action on the Kahlenberg where the Ottomans were defeated but not destroyed, while the first signs of bickering among the allies start to emerge. The tale doesn’t stop at Vienna, and the events of the remainder of the campaign are also told, including the two battles of Parkany which finally destroyed the Ottoman army, and later operations, for example in Hungary against the local rebels.

There is a great deal of contemporary correspondence included in the book which has been faithfully reproduced and helps contextualise the main narrative. As always the often amusing human side of these conflicts always fascinates me so I was not disappointed.

The book boasts a number of beautiful specially commissioned colour plates of the troops to be found in the army that defeated the Turks and broke the siege of Vienna, as well as a significant number of contemporary black and white illustrations and a selection of clearly drawn maps, including several showing the different phases of the battle.

Overall then, a tremendous and possibly the best account of the campaign written in English to date.

Friday 21 January 2022

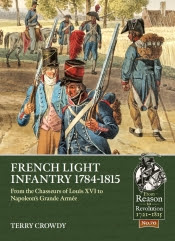
French Light Infantry from Helion


Another recent publication from Helion in their From Reason to Revolution series is this excellent book on French Light Infantry from 1784-1815, by Terry Crowdy. The book explores the development of light infantry in the French army from the Chasseurs of Louis XVI to Napoleon’s Grande Armee. The author is well-established as a military historian and specialises in the Napoleonic Wars. 


We start with the role of light infantry in the army of Louis XVI and how they developed into the Demi-brigade legere of the Wars of the French Revolution, before examining their role in the First Empire. The level of detail is really good, and I found the chapter covering the many changes that occurred during the Revolutionary War especially interesting considering the confusion that reigned at that time. Chapters follow covering light infantry tactics, uniforms and equipment, and light infantry eagles and colours. The last chapter is directed towards re-enactors and wargamers which is an infrequent yet welcome occurrence in books of this genre.


The book is jam-packed full of contemporary black and white illustrations and the central 24 pages are devoted to numerous contemporary colour plates, and from Patrice Courcelle many specially commissioned colour images. There are also examples of light infantry flags drawn by Anderson Subtil. 


Terry Crowdy clearly knows his subject inside and out. Overall a well written and clear account of the complicated evolution of French light infantry, where I found the whole section covering the organisation, unit structure, uniforms and unit provenance during my particular area of interest the French Revolutionary Wars particularly useful in raising my understanding. I would buy it for that alone.


Sunday 9 January 2022

Goth Overload! The last Late Roman campaign game for a while

On Saturday we played out the last remaining campaign battle which would then bring the first month to an end. Johannes Rufus' Roman army was marching back to the coast after razing the Ostrogoth settlement of Tabularasa to the ground, carting everything of value and all the old men, women, kids and the sick back to 'relocate them in the east'. The Ostrogoth army quickly gave up the siege of Aquilonisopidum and pursued the Romans, who turned to fight when it was clear they would be unable to outrun the enemy.

The Ostrogoth army is very different to that of the Visigoths, insofar that they have lots and lots of heavy cavalry, close and open order archers, and the option for some Hun or Alan allies. Not a war band of nasty foot warriors in sight. John's Romans were formed around a core of good quality legions supported by heavy cavalry, cataphracts and some light cavalry and war machines.  
Johannes Rufus the Scourge of the Ostrogoths. 

The Ostrogoths had opted for a flank march, an option the Romans declined. The latter were obviously suspicious that there were so few enemy figures on the table and rightly guessed that the Ostrogoths had sent a fair number of their troops (nine units of cavalry no less!) but had no idea when or where they would appear.
Let battle commence. The Romans on the left have taken up a defensive position  to face the  vengeful Ostrogoths opposite them.
The Roman right wing, with the rest of the army stretching off into the distance, slightly refusing the flank in case the enemy appear on the table edge.
The Ostrogoths. Half of their heavy cavalry were sent on a flank march, aiming to appear on the Roman  right in turn 2.
Roman and Goth cavalry clash around the settlement.
                            
The Roman left wing advances rapidly on the enemy.
The Romans took the battle to the enemy, but their two lines of infantry in the centre became separated.

The Goth right trying to hold back the Romans.
Esme moving this unit of Romans forward.
After the dispersal of the Alan’s, John pushed his cavalry forward.  Neil’s Ostrogoth cavalry suddenly  broke as they had hit their demoralisation point. A number of units failed their discipline tests and this tipped the command over the brink and they were forced to retire.
The Goths attacked the Roman centre, destroying this legion before the Roman cavalry 
intervened to b real the Ostrogoths in turn.
Another Goth unit hit this legion in the flank but were unable to destroy it immediately.
Conrad’s flanking force appeared and bore down on Nigel’s Romans. 
They broke one legion but then became bogged down in combat with two others. Several Goth units rode past the Roman right and attacked their centre with some effect.
On the Goth right their Alan allies began well, despatching some Roman light cavalry early in the game, but they were soon hard pressed by John’s advancing heavy cavalry and on the unfortunate demise of their captain, failed several  discipline tests and were either broken or were forced to evade off the table, effectively dispersing the entire command.
The Goths tried to make best use of their archers to delay the Roman centre. They certainly halted them, but it was only a temporary respite, despite seeing off two legions.
Dave commanded several  units of archers who did their level best to shoot the Romans down. They didn't destroy any units but did weaken them significantly.
The Roman cavalry on their left started 
badly but soon gained the upper hand.
Having now destroyed the legion they'd hit in the flank, the Goth cavalry were in turn hit in their flank by another Legio and destroyed.      
Esme is now supervising the destruction of the Alan cavalry.
A few gaps have opened up in the Roman centre following the flight of the two leading legions, but there are plenty to spare ready to fill the gap.
The Goth right flank has been turned as Roman heavy cavalry lap around the Limes watchtower.
More Roman cavalry and cataphracts advancing on the battered Goth cavalry.

By this time the Goths had lost two of their four commands and would probably have made an attempt to disengage. We agreed that their remaining cavalry under Conrad would escape but that the infantry in the centre were at risk, and indeed when I threw some dice to what happened around half of them were indeed ridden down by the victorious Romans.

It was never going to be an easy one for the Ostrogoths as despite having 18 units of heavy cavalry this was not enough to face off against a solid line of legions supported by some decent cavalry. Their flank march might have worked had it been on the other flank, but......

So, that was it. A Roman victory. I wonder how Johannes Rufus is going to justify defeating Emperor Digito's Ostrogoth allies or indeed come up with a good explanation? Obviously the Ostrogoths were angry at having their settlement razed to the ground, an act that was in direct contravention of Digito's orders.

I now intend to pause the campaign for a couple of weeks while I do the end of month accounts for everyone and publish another edition of The Gladiator. Everyone will be asked for their orders for turn five and beyond, so I expect a short pause while the various armies regroup before resuming the fight. I might also try and understand who is allied to who, if anyone, and give some of the less active players something to think about.

I've also had enough of ancients for the moment, enjoyable as the games are you can overdo it sometimes, so until all the campaign admin is done, we shall  in the meantime play  something different for a few weeks.
***********