Monday 30 October 2023

Eighteenth Century Interlude, but No String Quartet.


This week’s game was a long overdue eighteenth century game using Honours of War set in the fictitious (obviously) world of the War of the Electrical Malapropismistic Accession - sorry. The Anglo/Hanoverian/Brunswick army of the Paralitic League (hereafter referred to as the Allies) were holding a coastal town, we never did decide where, but it was by the sea, but had been ejected from the surrounding outer works by a combined French and Spanish army of the Bourbon Confection the previous evening. Non-English readers might not ‘get’ these apparent wrong word choices.

Conrad, Dave and Jim played the attacking French and Spanish while Paul, Nigel and Neil were the Allies.  The Allies had to recapture the three redoubts and avoid being cut off from the town. The French and Spanish needed to retain the redoubts and try and cut the Allies off from the town. None of us had played Honours of War for quite some time but we got back into the swing of things very quickly. 

The battlefield from the sea. The Allies are on the left with the Brunswick brigade closest to the beach (even then, the Germans were keen to get the sun loungers first!). The Spanish are facing the Brunswickers with the main body of French foot opposite the English and Hanoverian brigades in the centre. Both armies deployed their horse on the far flank in what was a very cramped part of the battlefield. 
The Brunswick brigade advances towards the Spanish.
The Spanish arrived in March columns in an attempt to cover some ground before deploying in line.
IR von Behr of the Brunswick brigade.
Brunswick hussars and Hanoverian dragoons on the Allied left.
The ‘English’ brigade in the centre. HM 43rd Highlanders, as they were then, lead the way with HM 12th and 51st beyond them and Hanoverian artillery on the hill. Behind the guns are HM 20th.
More Brunswick infantry, IRs von Zastrow and von Imhoff. The fourth Brunswick battalion in the brigade the Leib-Battalion, is out of shot the left amd the fifth, the combined grenadiers is to the right, again not in shot.

The opposing cavalry close the distance between their squadrons. And therein lies a question; ‘ why did both commanders deploy their respective and not inconsiderable numbers of Horse, squeeze them  into the narrowest part of the battlefield?’ If I’d been the French my cavalry would have been by the seashore ready to threaten and perhaps take the town. If I’d been the Allies I might have considered placing all my Horse in the centre. But I was neither….

The two bodies of cavalry collide, with several squadrons being forced back on each side.

A closer view of the cavalry action.

Meanwhile, in the centre, things were about to get noisy, after a false start that is when Paul threw a ‘1’ when trying to get his dependable brigadier to move. The Hanoverians kept pace with the English, their jäger creeping through the wood in the distance. HM 43rd had gone into the closest wood, being the only regular battalion I permitted to operate in woods closest to the big earthwork. 

Dave ordered his French infantry forward to ensure they kept the enemy off the redoubt. The Gardes Lorraine wearing yellow coats lead the charge. Royal Italian holds the redoubt.


A turn or so later the French attackers have lost two battalions and the Royal Italian now finds itself in the front line. The Garde Francais are just in shot to their right.

Back on the French left, the Brunswick advance had been halted and was being pummelled by the Spanish artillery, which had already blasted the combined grenadier battalion of Brunswick infantry to kingdom come.

The Brunswick brigade is now being forced back by some aggressive Spanish infantry supported by the 12-pdrs in the foreground. One Spanish battalion was destroyed but the Brunswick brigade had lost two battalions and was taking heavy losses.

By now it was clear the battle was coming to an end. The cavalry of both armies had practically exhausted each other, but there were only three battered French squadrons remaining against at least five allied ones, several of which were fresh. This was not good given that there had been an 11 to 9 advantage in favour of the much better French. 

In the centre the more numerous French held the main redoubt but had taken a hammering from the English and Hanoverian musketry, loosing a good half a dozen battalions destroyed or forced out of the line. They had suffered quite a bit from the jägers shooting at their densely packed battalions from the wood. The jägers were classed as ‘inferior’ but their steady fire pecking away at the French flanks added much to the woe of the French, who were unable or unwilling to counter their fire until it was too late to do much about it.

As you will already have read, the Spanish on the left were pushing the Brunswick brigade back, but the French right had gone and the centre was about to collapse. The French still held or denied the enemy all three of the earthworks and were threatening the town, but their losses had been astronomical so if the Allies had continued the French would have been completely overwhelmed. It was clearly an Allied victory.

What a cracker of a game. Everyone was happy with the outcome and I’ve given myself a much needed and long overdue 18th century boost. 


Wednesday 25 October 2023

Valour and Fortitude v2 Battle Report

John and I played a trial game yesterday evening using the second edition of Valour and Fortitude. I rearranged the terrain from last Saturday’s game and used the 1808 Swedes and Russians who had been bloodied in the same game. I took the Russians and John the slightly reinforced Swedes as I’d just completed the second half of the Savolax Jäger, seen here:


The Russians were again the attackers. My plan was rash and poorly executed but it gave us plenty of opportunities to run through the rules. The river was impassible for all troops except over the bridge but I reckoned putting my horse artillery supported by a regiment of cavalry would be a good way of bringing the full weight of my artillery to bear on the Swedish line as I would be able to enfilade it nicely. Meanwhile my infantry would advance and engage the Swedes as quickly as possible and try and overwhelm them.

The Russians are advancing on the Swedish left. My jager battalions have moved into the wood in the centre to counter the pesky Finnish jäger my cavalry was rooted to the spot refusing to move.

Unfortunately the Swedes were able to present a pretty solid line to face my advance, with their Savolax jäger advancing through the woods to threaten my flank, and more importantly the half-battery of guns deployed on the road. 
The Russian right is getting a bit bogged down and also is starting to take casualties from the enemy jäger and artillery. 

The Swedish dragoons about to ride down one of my battalions.

After one of my battalions broke under the effects of the fire from the jäger John decided to attack me with his cavalry. He rode down one battalion ( above) which was not able to form square but recoiled when it tried to charge the battalion seen here that had wisely chosen to form a square despite being shot at by enemy guns and infantry.

Meanwhile in the centre things were getting bogged down as I was unable to dislodge the enemy troops from the woods despite being able to get stuck in with the bayonet. (As it happens we made a mistake with the rules so I probably would have driven off the Swedish jäger in the wood).

My left flank advanced and was held up by the combination of enemy artillery, infantry and more bloody jägers! I tried to avoid masking my artillery which caused my columns to bunch together and cause all sorts of problems for me. 

My far left over the other side of the river. My plan to deploy the entire horse artillery battery on the Swedish flank while being safe from interference went pear shaped from the start as I repeatedly failed to activate this brigade, until I realised I could use one of the event cards to get at least one unit moving. One half battery did manage to deploy just this side of the bridge but the other was too slow.

By now we had played six turns. Had we not been stopping to check the rules we would easily have got into double figures and we may even have got a clearer result. As it was, I had failed in my objectives and in the process a brigade had wavered, giving John a victory point. I’d also lost four battalions of infantry, but we won’t talk about that!

As for the rules, I think we both agreed that had we not made so many errors and misunderstood some of the key parts of the rules then it would have had a significant positive impact on the game. It might also have helped if we had read the section on terrain effects! 

The actual mechanics are quite straightforward and the rules themselves quite simple. In some ways they are a bit ‘Black Powder light’ (not a criticism) but only insofar that the troops characteristics are similarly presented. Activation, shooting (before movement), actions and melee are simple but not simplistic, and I like the shooting before actions sequence, especially as if a unit shoots it cannot move or perform any allowed action. The morale rules are effective and can be quite severe if the player isn’t careful. The event cards also added a little unpredictability and fun to the game.

For an evening game over a couple of hours these could be a good choice, as a result would be almost guaranteed once the players became familiar with them. I am uncertain how they would work for one of my big multiplayer Saturday games, as we might find ourselves finished by lunchtime, but I guess I shall happily have to try them and find out.

I had amended the Russian army characteristic sheet in the rules to reflect better ( well I think so) the army of 1805-1809 and created a new one for the Swedes/Finns. I think I made the Finns, especially the jäger, too good but that can be easily remedied.


Tuesday 24 October 2023

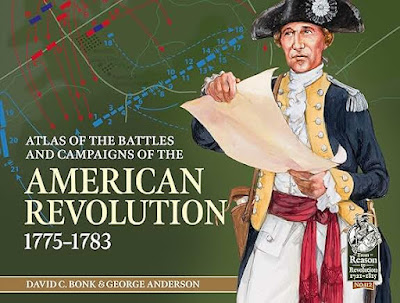
Atlas of the Battles and Campaigns of the American Revolution 1775-1783

In this book Helion, as part of their ‘from Reason to Revolution’ series, have produced a remarkable history of the American Revolution which students of the war or just those with a passing interest will find incredibly satisfying and informative. Author David Bonk and graphic artist George Anderson should be very pleased with the result of their labours.

It is a big book in physical size and in its scope. The maps, all 119 of them, are the absolute unquestionable stars of this publication. They are colourful, full of detail but not too detailed so as to verge on being confusing, and are very well produced and provide a clear image of each campaign, battle and skirmish that took place in America, as well as further afield in the West Indies, the Indian Ocean and the siege of Gibraltar.

After the introduction and a look at the British ‘empire’ in North America and the path to war, we leap straight in to the body of the book. It is helpfully broken down into chapters for each year from 1775 to 1781, and each action is dealt with chronologically, every year beginning with a useful strategic summary. So, for example, in 1780, we get the aforementioned strategic summary, followed by a chapter each on the Charleston campaign, the siege of Charleston, Charleston Neck, Waxhaws, Connecticut Farms, Springfield, Hanging Rock, Camden, King’s Mountain and Blackstocks. The maps for each of these are accompanied by a brief but detailed summary of the engagement AND orders of battle for the forces engaged.

Military atlases are a popular medium for providing a good solid foundation that readers can use to broaden their understanding when they are done well. This one is an absolute stunner, and was clearly a labour of love for both authors. They should both be incredibly pleased with the end result, and this review comes with with my admiration and congratulations for a job very well done.

I sold my American Revolution armies many years ago as my interest had waned significantly, but now that interest has now been rekindled significantly. Will I replace them? Not for a while,  it maybe sometime next year? Who knows……..


Sunday 22 October 2023

Russian vs Swedes 1808

We played a small Russo-Swedish War game today, primarily to get both armies on the table to see how they performed. The scenario bore little resemblance to the real war, the main reason being the amount of cavalry from both sides on the table and the overall size of both armies, but I wasn’t going to leave anything off the table for the first outing. Conrad and I were the Swedes while John and Jim were the Russians. Paul umpired as we were using his rules.

It was a simple encounter battle of sorts set somewhere in Karelia. No finesse was required and both armies had to achieve victory by driving off the enemy and/or holding more objectives than the other. The Swedes deployed in a long line with their cavalry on the right and the better of the three infantry brigades on the left.

As usual it seems that Blogger has decided to randomly re-order my photos, so although I’ve made an attempt to put them back in sequence I can’t guarantee it so just enjoy them for what they are.


The armies facing each other. Unusually for me the table isn’t loaded down with masses of figures. The Russians had two strong infantry brigades and a cavalry brigade, all supported by two batteries of artillery, representing 24 guns in total. The Swedes (Finns) were able to field a brigade of cavalry and three of infantry, one of the latter being composed largely of jäger. They had three artillery batteries, all light guns, representing 12 cannon.
I had just finished this 3d printed ruined castle keep so it found itself on the table representing perhaps the ruins of a Teutonic Order castle from several hundred years before. Basically any excuse to get it on the table.

The Swedish centre held by the Bjornborg and Helsinge regiments.

Conrad commanded our left and quickly ordered his jäger forwards to harass the enemy, which they did very well as the Russians were unable to get over the fences (and stay over them) for the entire engagement. The Savolax infantry regiment can be seen supporting their jäger, but they were never needed.

Jim’s brigade struggled to get moving and became bogged down by the harassing fore of the Finnish jäger and the safety of the fences. Their artillery was unable to get into action as the gunners and gun teams were unsportingly shot down by the jäger as they tried to deploy.

Jim’s attack as seen from the Swedish side.

Meanwhile, John took his infantry and cavalry across the river. Again, this was a slow process.

I thought it would be a good idea to try and catch the Russian cavalry as they crossed the stream but the Nolan’s Dragoons were halted as they advanced by Russian artillery. The Karelian Dragoons were more successful and actually pushed two squadrons of Russian cuirassiers back,  for a little while at least.

The left flank again. Nothing much happening.

However, John’s brigade was over the river and advancing on the thinly held Swedish centre.

After a brief scare when their cuirassiers were driven back the Russian cavalry rallied and the Swedish cavalry brigade had to retreat, all the time under fire from Russian horse artillery across the stream.


John tried several times to advance against our centre but each time his troops were driven back. 

We had to call it a day at this point. The Russians claimed a victory but they had not beaten the Swedes; even our cavalry had recovered. On reflection and with the energy of being biased I think the official report will say that we held the Russian invaders up, caused heavy losses on their troops and then made a strategic withdrawal to fight them again as they continued their invasion. The poor commander of my cavalry had been shot down by a cannon ball early in the engagement but he may return, possibly minus an arm. 

This was an enjoyable game and made more so by the banter and suchlike, and seeing my new collection on the table for the first time was very rewarding. Jim and John (sounds like the title of a Francois Truffaut film) did as well as they could after not deploying their troops as effectively as they might have and for keeping their collective cool when their infantry ambled forward slowly. I have another dozen or so Russian battalions to complete (to start in most cases!) but these should be done by Christmas, together with more cavalry including hussars and Cossacks. The Swedes are just about done, although I have the figures for some grenadiers and more light infantry which while not needed will no doubt see their day on the painting desk.

I need to sow the seed for a big Russian vs French game although as I currently have very few of the latter will have to rely on the others to contribute.

Friday 20 October 2023

Savolax Jägers, Russo-Swedish War.

The Savolax Jäger were a Finnish unit that was heavily engaged in the defence of their homeland from the Russian invasion. I have another dozen to finish. 


Russian Napoleonic Cuirassiers, Russo- Swedish War

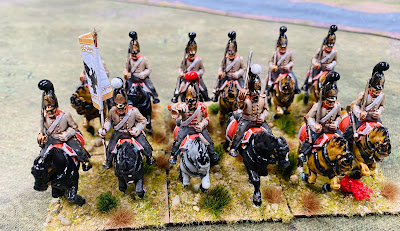
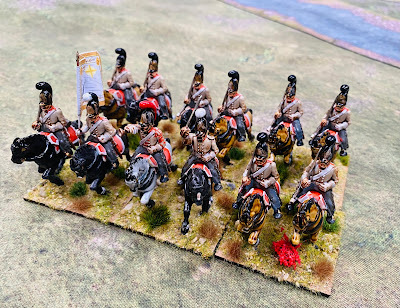
These are the first two squadrons of my Elizabetsgrad Cuirassiers. There were no Russian cuirassiers involved in this war, but (a) they could have been, and (b) it broadens my opportunities to field them against the French in 1807-1808.

These miniatures are all 3d resin prints and have turned out ok I think. I went with a less than pristine white for the coats to allow for some contrast with the cross belts. No loss of detail compared to metal castings, and by comparison they are cheap and very robust. Anyway, see what you think. 


Just another 18 figures to do to complete the regiment, and I’m well on with them.

Wednesday 18 October 2023

I Just Could Not Resist - Franco-Prussian War French Musical Support.


I’ve always been amused by this picture. It took a bit of time and a then quick scour of Etsy to find a suitable tuba to form the basis of this silly vignette which I’ve just completed. I also drafted in a dismounted French dragoon to blow the thing.


The Potato War

The Potato War. Discuss. This new book in Helion’s ‘from Reason to Revolution’ series delves into what to many readers is a conflict that may have passed them by, or they may have heard of it by what it was called by contemporaries, that is, the aforementioned ‘Potato War’, so named as the troops spent more time trying to find food and other provisions rather than actually fighting the enemy.

What makes this short war of particular interest is that it was Frederick the Great’s last war and arguably marked the beginning of the decline of the famed Prussian army of the preceding years of the eighteenth century.

The author begins with introducing his approach to writing about the war, whereby he aims to give a balanced account of the capabilities of the Prussian army. His analysis of the road to war, the armies involved and of taking a fresh view of the organisation capabilities of the Prussian military machine is clearly presented. He also provides a good account of the armies of the Austro-Hungarians and Saxons. For a war largely devoid of battles the chapter covering the war itself is full of detail regarding troop movements and what actual combat there was largely restricted to the ‘Klein Krieg’ of skirmishes (at which the Austrians excelled) and the occasional bombardment.

The book is illustrated with many contemporary black and white images, some of which are new to me, and eight striking colour plates showing some of the uniforms of the troops involved. These are really good, and I particularly like the last one depicting a Saxon jäger in a very unusual hat.

There are also three appendices, which will be of particular interest to war gamers looking for something a little different as they provide very detailed orders of battle of the Imperial and Royal Austrian army and the allied Prussian and Saxon forces. The final appendix gives a breakdown of the composition of the Prussian army in 1778, and it might be interesting perhaps to compare this with the Prussians at the close of the Seven Year’s War.

This is a well written and researched book, using many primary German language sources supported by a wide range of secondary sources. As a fascinating and rare English language account of a little known war, it should be of great interest to anyone attracted to the campaigns and life of Frederick the Great.


Tuesday 17 October 2023

Some more Napoleonic Russians

A command base and a little vignette with a disgruntled Russian general surrounded by boozing lady Cossacks, the latter I think from long defunct Hinterland Miniatures. I think I bought them when I dabbled in VBCW which will be at least 12 years ago. I knew they’d come in handy one day.