Sunday, 14 November 2021

The Anglo-Spanish War, Volume 2: Jamaica 1655-1660


It doesn’t seem that long ago that I was writing a review of volume 1 on this subject. The Anglo-Spanish War 1655-1660, Volume 2: War in Jamaica picks up where the first volume left off with the English occupation of Jamaica after their bungled attempt on Hispaniola and takes us through the next five years of conflict on the island, the rest of the Caribbean and indeed the world, concluding with the Restoration and transition of Jamaica into a Crown colony.

This is No. 74 in Helion’s seemingly never-ending production line of excellent books in the Century of the Soldier series, and it is every bit as good as volume 1, and at over 300 pages is BIG, but reading it was an education and a pleasure. Apart from the vague notion that the English took the island off the Spanish and that Errol Flynn in his persona of Captain Blood may well have been knocking around at the time the detail of how we (the people of Britain) expanded our colonial ‘empire’ in the West Indies in the mid-seventeenth century by means other than simply working towards some ultimate ‘Grand Design’ (beyond Cromwell’s vision of rampaging across the Caribbean taking Spanish territories at will),which is essentially how it all panned out.

Anyway, the book is divided into two main parts plus three appendices. Part 1 covers the campaign in Jamaica, split into chapters on the campaigns of 1655-56, 1657-58 and 1658-1660. Despite suffering appalling losses from disease the British were well led and regularly reinforced, whereas the Spanish were rent by divisions among their commanders and were surprisingly badly supported by their other Caribbean or American colonies or their homeland. The account of the campaigns is well written, easy to follow and packed full of fascinating detail, with admirals and generals I have largely never heard of, all supported by new and contemporary maps and, my favourite bits as ever, contemporary quotes liberally dotted throughout the text which always add a little ‘something’ to the narrative. The book contains eight colour plates, each of contemporary maps of the island which I found fascinating.

Part 2 contains chapters on the Jamaica garrison, maritime affairs, and Jamaica as a colony. As with part 1 these chapters are full of detail, and the problems of maintains garrison (that is, trying to keep ahead of the horrendous mortality rate of soldiers based in Jamaica), naval operations, whether official or conducted by privateers, against the Spanish and the trials and tribulations of maintaining the colony through increased trade, sugar cane production, religion, an interesting section on the effects of alcohol, and trying to encourage more settlers, throughout the entire period.

Finally we get three appendices. The first provides us with a complete order of battle for the naval and land forces in the summer of 1655, the second covers the island of Tortuga and a glimpse into the lives and operations of the privateers and pirates, and the last on the English occupation of the Cayman Islands.

Overall then, this is an excellent, well researched (using a vast array of primary and secondary sources) companion to volume 1, and does a great job shedding light on a campaign not often the subject of such in depth research.

Friday, 12 November 2021

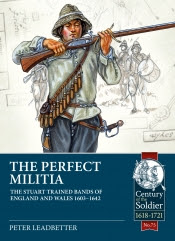
The Perfect Militia. The Stuart Trained Bands

As promised, a review of one of the Helion books I acquired a couple of weeks ago. 

This is book number 75 from Helion in their remarkable ‘Century of the Soldier’ series This is an in-depth study of The Trained Bands in England and Wales in the period 1603-1642, that is, up to the end of the Bishop’s War but NOT the Civil Wars. I knew next to nothing on the subject but I am pleasantly surprised at its content. The book is an absolute mine of fascinating information covering what must be every aspect of the Trained Bands, including commentary on the officers and men, their equipment , organisation, how they were mustered, how they served, their drill, the roles of the various civil and military officers, uniforms or lack thereof and colours. An eye opener for me was that for some reason I had never thought about the existence of cavalry amongst the ranks of the Trained Bands. Interesting too is the explanation of the often difficult relationship between the Trained Bands and the King, and the debate about their effectiveness, or more probably not, as a force for dealing with civil unrest or invasion. Perhaps thankfully they were not put to the test.

The book contains no less than nine interesting appendices. Of particular interest is the one detailing the training manuals for Derbyshire and Hampshire, the former appearing far more comprehensive, including as it does quite detailed and informative notes on the roles and responsibilities of the officers, non-commissioned officers and the drummer within the company. The final appendix brought a smile to my face, it being the reproduction of a letter purportedly reporting a sighting fairies drilling in the countryside. Perfectly normal occurrence I’m sure.

As ever a well written and informative book on an overlooked and very English institution, with some nice black and white illustrations. A fascinating book and a must for seventeenth century buffs.


Thursday, 11 November 2021

Late Roman Campaign #II

We started this campaign a few weeks ago and have now completed turn II. Mixed amount of activity has been displayed by the players, which is fine, but evens did ratchet up a notch when I threw for the monthly random event (under National Lottery-like security). Richard had the dubious honour of his troops electing him as emperor, pinning the proverbial target on his back.

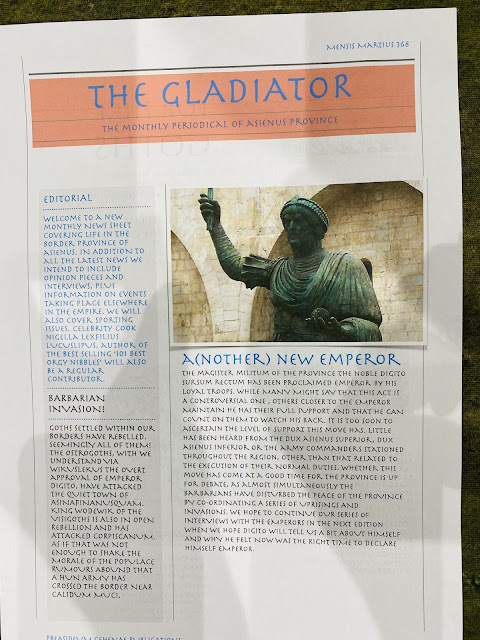
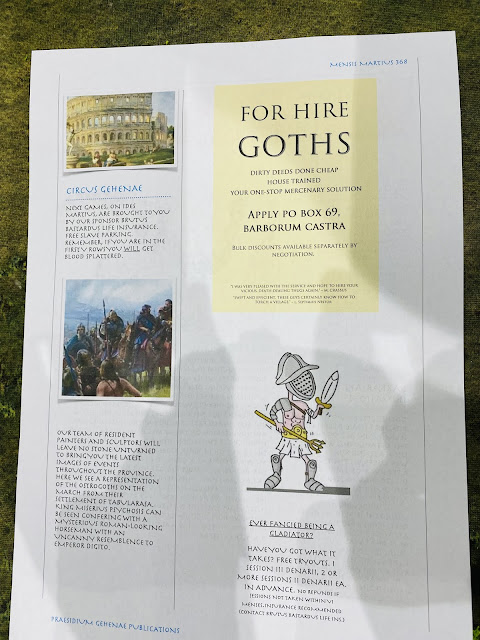
I’ve produced a little newsletter for the players so thought I’d include Issue I, Mensis Martius, of the Asienus Gladiator, here. Click on the pictures to enlarge them further.


We have the first battle of the campaign on Saturday so I shall write it up here when it’s over.

Sunday, 7 November 2021

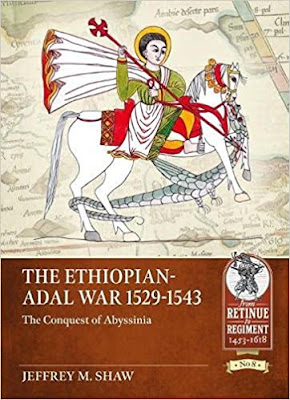
The Ethiopian-Adal War 1529-43


I had a vague idea that the Portuguese were involved militarily in Ethiopia in the sixteenth century, but beyond that it was all a complete mystery to me. Not quite so now, as this is a subject that the author clearly has a pretty comprehensive understanding of, and having read the book now I feel suitably enlightened. Books on the Ethiopian-Adal War of 1529-53 are not something one comes across very often (if ever before now)in English, so the fact that the author has presented such a readable and educational work based on largely Portuguese and Ethiopian sources is beyond amazing!

Adal was a Muslim Sultanate, it’s borders corresponding with the territory of modern-day Somalia. In 1529 they invaded Christian Ethiopia, and little by little the Ethiopians were driven back and on the verge of defeat, until the Portuguese (already with a presence in the Indian Ocean) stepped in to support their fellow Christians in the war against Islam and the Ottoman Empire with a small army that punched well above its weight in the battles to come.

In addition to an interesting account of the key players, the armies, campaigns and battles, we get a good bit of background into the region and it’s diverse peoples. It is clearly well researched and illustrated throughout with maps and contemporary illustrations.

For something a little different I can recommend this book highly, and I guess it has a fair bit of wargaming potential for those who like to collect figures and game the the more fringe conflicts.


All at Sea

I went to the club in Durham for the first time since before the COVID lockdown last week. Richard was putting on a Black Seas game, using British and American ships for the War of 1812. I’ve always been interested in naval wargaming but have previously found the rules gave me a headache due to their complexity.

Here’s a few photos of the game, with American privateers and USN brigs trying to break out of the Chesapeake, covered by a swarm of gunboats and a frigate. The inshore squadron from the Royal Navy comprised a frigate, several sloops or brigs and in the distance bearing down on the action to cut off our escape a 74 gun ship of the line!


I enjoyed the game, especially as our side (the Americans) managed a win, despite a couple of ships (including my frigate) striking their colours, although the RN also lost a couple of ships as well. Three of our ships escaped. My frigate took possession of the RN frigate which had struck, only for my frigate to strike the next turn. I don’t know how that would pan out.

I think it’s best to suspend belief and ignore what you might know or think you know about the war at sea during the Napoleonic era but once you’ve done that the actual game is good fun. The 74 had a broadside not much more than the frigates or brigs, two of which slipped past without suffering any damage, which is obviously wrong but hey! I might even buy myself a ship.

The ships are all Warlord models from Richard’s collection.

Friday, 5 November 2021

“We came, We saw, God conquered” - The relief of Vienna 12 September 1683

So wrote King Jan III Sobieski of Poland in his letter to the Pope after the siege of Vienna was lifted with the defeat of the Ottomans at the battle of Khalenberg on 12 September 1683. The last game here at the Burrow on Saturday was an attempted recreation of this important victory which saved Christendom from the Turk. This wasn’t the first time I’d run this game but in the intervening four or so years I’d acquired lots more Ottomans, a few more Poles and several squadrons of Imperial Cuirassier types. I had been planning to do this game as a demo at the Battleground show in Stockton on 20 November but I’d been forced to withdraw due to my spinal problems and the chronic pain this gives me in the realisation, much to my wife’s relief, that I really can’t expect to run a massive demo game when I can barely walk. The practice/rehearsal game was all set up at home and the guys were coming round so battle was joined. 


Conrad, Neil and Richard were the forces of Christendom while Paul, Mike and I were the dastardly, er no, dashing Turks. The Christian army had spent the best part of the last 48 hours moving into position through the Vienna Woods, a vast thickly wooded area riven with steep ravines, meeting little opposition, until they emerged looking down onto the Ottoman camp and the siege lines surrounding Vienna. The battlefield was covered in vineyards and mostly burnt down small villages and hamlets, some of which had been fortified, and the main camp was protected by a long earthwork called the ‘Turkenkranz’. The photos are more or less in order but I can neither guarantee that, nor claim that it makes much difference anyway. Just enjoy the spectacle!

Janissaries occupied the burnt out village on the Ottoman right.

The Ottoman right,.
The Poles emerge from the Vienna woods!

The Ottoman centre and the Turkenkranz earthworks.

The allied left under Charles of Lorraine (Neil)

I thought it best to attack the Poles as soon as they appeared on the table. 
                                                   

The Poles surge forward

Richard's cuirassiers in the centre getting stomped!

The ottoman centre, and in the background the massed allied attack on our right.

These irregulars just had to go and charge a squadron of Saxon cuirassiers! 
Amazingly they only bounced and the cuirassiers were  already shaken so couldn't follow up.

Janissaries in the ruined village on the Ottoman right.
The Ottomans on the right were successfully holding off the combined infantry attacks from 
 a right Bertie Basset of Austrians, Brandenburgers, Saxons, Hanoverians et al!
Spahi ready to pounce on the allied attack. They never did!

The allied attack in the centre got nowhere and ultimately the central division was broken.


The allied attack against the Ottoman left.

The allied infantry were breaking like waves on the shore!

Richard in the allied centre had by now lost two of his brigades, leaving only a small  command representing Lubomirksi's auxiliary corps which was paid for directly from Imperial funds and were equipped as Western-style cuirassiers. The Turks in the centre advanced from behind their earthworks to engage b both enemy flanks.

Richard's cavalry attacking the Ottoman left before it was forced to pull back shaken.
Allied infantry assaulting the Ottoman positions in the centre.

Balkan irregulars about to be ridden down!

The Ottomans held on to the village on their right wing all day.

The Poles on the allied right piling on the pressure.

The hussars and pancerni were unstoppable!
There were 14 regiments of Polish cavalry on the right wing and they overwhelmed the much weaker Ottoman command facing them. It was a splendid sight, even if it was a brown kaftan moment!


Obligatory cute puppy shot. Toffee was a secret Ottoman at heart as she ran off with and tried to eat a few Polish infantry that had been left within reach!

The length of the battlefield from the Ottoman right.


The shots below are out of sequence but I've left them in just to add to the spectacle of what was an excellent game,


So, by 3:30 it was all over. The allies had lost their centre and their left was going nowhere, but the Ottoman left had been comprehensively steamrollered by the Poles, who were poised to roll up our flank, which they would have managed to do easily enough.....maybe?  The Ottomans were by no means destroyed but were declared the marginal losers of the battle. Much like the real affair, it wasn't a crushing allied victory but Vienna was saved his time as well. Last time we fought the battle the allies were less successful. 

The game was a tremendous spectacle and I was able to field Poles, Ottomans and my late seventeenth century armies. Everyone had a great game, although historically I reckon the Ottoman commanders will all have an appointment with a bow string while our collars size is checked!

I reckon the Polish hussars were too effective, even though I'd made them not quite as tough as in the 'Pike and Shot' book. Of course we were using Black Powder with my own stats and amendments (so more like Pike and Powder, or Black Shotte). Maybe I need to buy some more pancerni or reduce the number of hussars? Nah!


Wednesday, 20 October 2021

In the wilds of Wallachia. The Battle of Rymnik, 22 September 1789

Last Saturday’s game was another first for us at the Burrow. I wanted to do something a little (?) different again, and as I had recently completed the basing of some late seventeenth/eighteenth century Ottomans I came up with this battle fought between the Ottomans and a combined Russian and Austrian army led by the soon to be legendary General Alexander Suvorov. 

Dave had command of the Austrian contingent deployed in the centre on the far side of the table. If he was taking advice off Esme then that will perhaps explain how things went later in the game!

Details of the battle are hard to come by so the terrain and armies were pretty conjectural (i.e. guesswork). My French Revolutionary Wars Russians and Austrians were used to oppose my mid-to-late seventeenth century Ottomans who stood in as their great great grandchildren for this battle.  So, button counters look away now, 'cos the figures were not really right, the terrain was based on a couple of old images of the battle, google maps and a brief description, but as a game it would (and did) work very well. A brief account of the real battle can be found here.

The battlefield, Ottomans on the right.

Mike commanded the Russian right flank, with six battalions of infantry, two regiments of cavalry and a battery of 6-pdrs. Te hussar regiment seen in the front (in black) didn't last beyond turn 2 (maybe it was turn 1) when they were hit by cannon and musket fire and failed a break test.

There was a full house as there were eight players this week, so to avoid my head exploding due to using a more complex and unfamiliar for some set we used the ever popular with the right mindset Black Powder 2 with my own house rules, which essentially just switch the turn sequence so shooting comes before commanded moves, which as I've said before actually improves the dynamics of the game. Paul, Dave and Mike were the Russo-Austrians, with John joining later in the morning with their as it turned out much-needed reinforcements, and Neil, Conrad, Shaun and Nigel were the Ottomans. The Russians and Austrians were hampered by some below average commanders (apart from Suvorov of course) which was seriously hamper their movement.

The Russians won the initiative and in turn one Paul, in command of the Russian left,  threw very low and managed three moves. Six battalions and three cavalry regiments supported from afar by a battery of twelve 12-pdrs surged forward to within inches of the Ottoman right, all eight regiments of spahi of it, supported by hoards of Deli and Tatar light cavalry. Oooops I thought!

The Ottoman left.
The Ottoman left flank again, anchored on a nice little redoubt. These were  the best troops the Ottomans had available (well, not including the attached Balkan irregulars seen just beyond the spahi, who could never be counted as among their best troops!)

Meanwhile.......


On the Russian left flank, Paul's division surged forward getting three moves, drove off the Tatar light cavalry and halted in the face of all those spahi! Both sides had effectively pinned each other. The Turks had the advantage as they were able to shoot with more effect at the battalions that made it into square hoping to disorder them, after which the spahi would charge in and finish the job. The Russians still took some dislodging! All day in fact although to be fair it was defended by janissaries who were eventually kicked out, by which time there were precious few Russian left standing.

Another shot of the Russian surge on their left wing.


This wood on the right acted as a magnet and drew battalion after battalion of Russians towards it. Only the third assault succeeded in driving off the janissary defenders.

The Russians are stuck fast.

Neil’s Ottomans on their left made a bee line towards the village.

In the centre Shaun ordered his infantry to advance and attack Dave's Austrians in the centre, secure in the knowledge that their flank was secure.

Turkish infantry closing on the Austrians in the centre.

The Ottoman centre was held by several quite ineffective artillery pieces. At least the camp was safe.
Neil continued to push his command forward and occupied the village. Mike's Russians attacked the village from across the stream to no effect as their assaults were twice repulsed.
Meanwhile John and the Russian reserve had appeared on the Turkish left. There were only four battalions of combined grenadiers and a regiment of cuirassier but they made their mark.
Back over on the other flank again, the outnumbered Russian cavalry was vainly trying to hold back overwhelming numbers of Ottoman cavalry. Fair to say, they did well but they were doomed.
The players pause to reflect on progress so far.


The allied centre is about to take the brunt of the Ottoman attack.
The Ottoman left continued its advance straight towards the Austrians who were struggling to hold the janissaries back.
Meanwhile the pinned Russian infantry squares were being worn down slowly. It might have been around now that I reminded the Russian players about my not so subtle hints in favour of divisional squares rather than lots of piddling battalion ones. 
The Russian attack against the village was not going at all well.

In the centre Neil’s and Shaun’s attack was building up  the pressure on the beleaguered Austrians.
Back over on the other flank once more Paul’s cavalry was still doing a stirring job holding back the spahi but they were being swamped. “Ottoman Spahi v Russian Dragoon” would make for an  interesting Osprey title.

Paul’s Russian infantry being slowly eroded away by the Ottomans.
Once disordered the Russian squares were an easy target for the spahi.
The Russians finally broke into the village after their artillery pounded the defenders so hard they were forced to pull out.
Outside the village the attack wasn’t all going the Turk’s way, as  one of Mike’s battalions broke a unit of Janissaries.
John’s division quickly overran the Ottoman redoubt and drove off their supporting regiment of Spahi. They then took the Ottoman left in the rear but stalled as the Janissaries fought back stubbornly.

Paul’s cavalry were still fighting, but this last dragoon regiment has had it, and was surrounded and overwhelmed by Spahi and Tatars.
Another shaken Russian square about to be broken. 
A general view of the situation in the centre towards the end of the game.
The Russians poured into the village on the heels of the retiring Janissaries while the centre still struggles to hold back Shaun and Neil's attack.
Neil’s troops are holding back the advancing Russian grenadiers on their flank…..just!
The Russian left is in complete disarray but their artillery fought off  an attack by Ottoman cavalry (how I don't know but it was a rare event!). I guess being classed as a large 12-gun battery helped.
My favourite regiment of Russian hussars fending off a unit of Tatars before they were attacked in the rear! Damned unsporting!
I think this is slightly out of sequence but shows the battle for the allied centre.
The Ottoman CinC encouraging his really very poorly motivated irregulars forward.

Well. That was immense fun and an incredibly colourful game, certainly from where I was sitting/standing. The Ottomans managed a slim victory over the allies on the basis that their right wing had shattered but not yet broken Paul's Russians but with the loss of pretty much all their cavalry the allies were in a difficult spot. The crumbling centre held by the Austrians was certain a cause for concern as I doubt they'd have held for another turn.  The Ottoman left had been pushed back but it was still in reasonable shape. The Russians were tough, as seen on the other flank, but I doubt they'd have succeeded. So the Ottomans did much better than in the original battle, which wasn't that difficult if you've read the account.

Eight players guided, fed and watered by yours truly played the game to a conclusion in less than five hours (less at least half an hour for lunch) and there must have been almost 70 units on the table, so no mean feat. I don't plan to expand my Ottoman army to make it more appropriate for the later end of the eighteenth century; the seventeenth century figures will haver to do and whoever not?

No game next week but there will be 30 October I hope.